
Creating Multi-Phase Plans

This guide walks you through building a multi-phase subscription timeline in the Admin Panel: adding a trial phase, configuring introductory phases, and reviewing the timeline before publishing.
If you are not yet familiar with how phases work, read Understanding Multi-Phase Subscriptions first.

Before you start

  • Decide whether the plan needs a trial phase.
  • Define the number of introductory phases, if any.
  • Confirm the duration and price of each phase.
  • Review the complete timeline before publishing.

Step 1: Open the plan timeline

In the Advanced Setup section of the plan configuration page, click Add Phase to start building the subscription timeline. Plan Timeline & Phases in the Advanced Setup tab, showing a trial phase, two introductory phases, and the main plan Each phase appears in order with its name, price, and duration. The main plan always sits at the end of the timeline. Once a plan is activated or published, the duration and structure are locked and only the phase name and price can be edited.

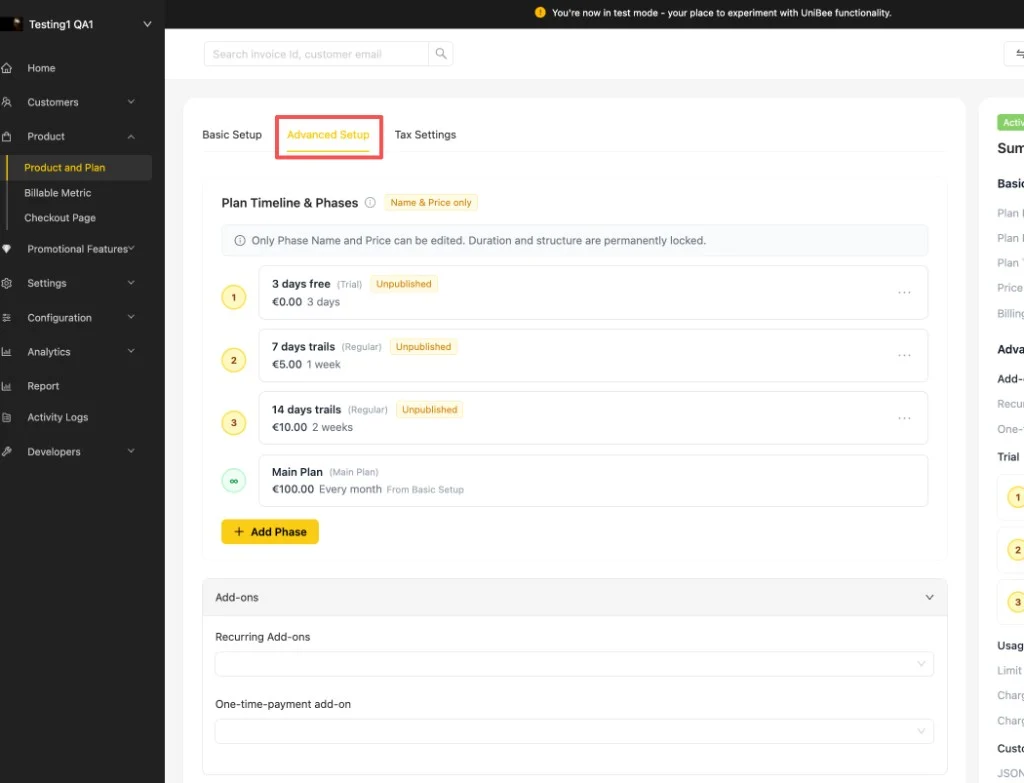
Step 2: Configure the trial phase

SettingDescription
Starting pointSelect the Trial tab when adding the first phase.
TemplatesUse 7-day, 14-day, or 30-day templates for faster setup.
PriceSet the trial as free with a 0 amount, or use a custom paid price.
LimitOnly one trial phase is allowed per plan.
When you add or edit a phase, the Edit The Phase dialog lets you configure its details: Edit The Phase dialog with Phase Name, Duration, Total Price, Original Price, Requires Payment Info, and Metadata fields
FieldDescription
Phase NameThe label shown for this phase in the timeline and at checkout.
DurationThe total length of this phase (for example, 3 days).
Total PriceThe one-time total charged for the entire phase duration, not a recurring fee.
Original Price (optional)A reference price used to show a discount against the phase price.
Requires Payment InfoWhen enabled, users must provide a payment method to start this trial phase.
Metadata (optional)Attach custom key-value data to the phase to pass structured info to your backend or integrations.
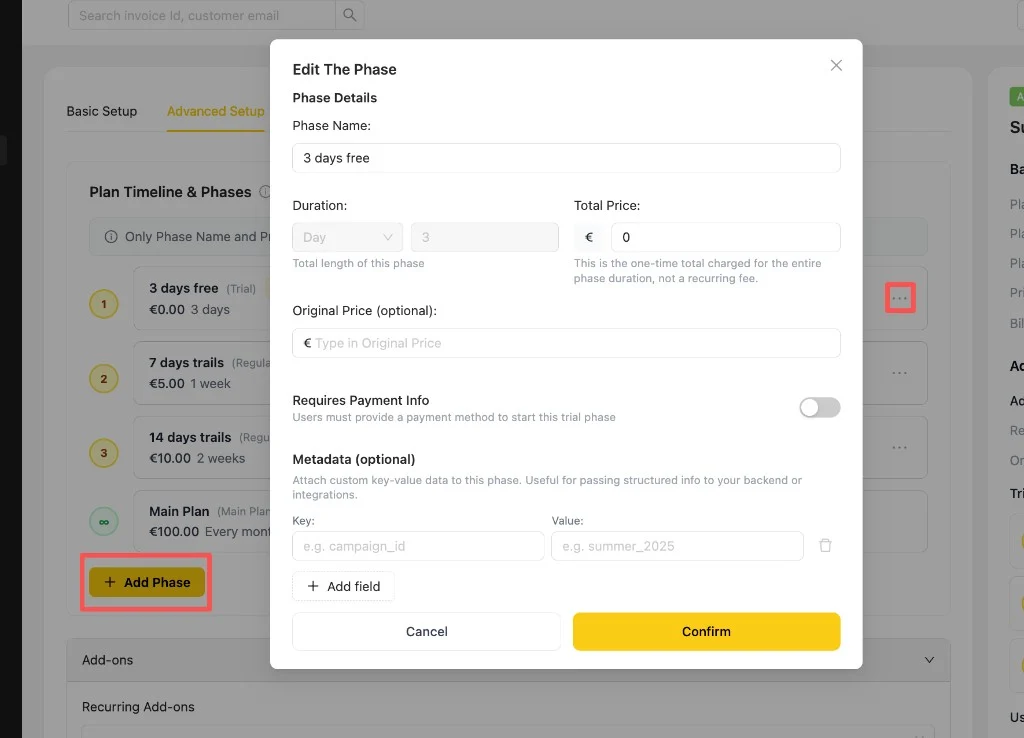
Click Confirm to save the phase, or Cancel to discard it.

Step 3: Add introductory phases

SettingDescription
PurposeSupport promotional pricing or staged onboarding.
TemplatesUse common starting configurations, then adjust them as needed.
Configurable fieldsDuration, price, and billing behavior.
OrderingIntroductory phases can be reordered before publishing.

Step 4: Review the timeline

Review the full sequence before publishing. The timeline should match the customer journey shown during checkout and after purchase. Once you activate or publish the plan, the phase order becomes fixed.

Next steps